Background
Sentinel-1 Ground-Range Detected (GRD) Synthetic Aperture Radar (SAR) products are available for download from ASF’s Vertex data portal. These Level-1 GRD products are georeferenced to geographic coordinates using the Earth ellipsoid WGS84, but are still in SAR geometry.
By following this data recipe, users will learn how to geocode Sentinel-1 GRD products using the Geospatial Data Abstraction Library (GDAL) raster utilities, specifically the gdalwarp tool. GDAL is open-source, free, broadly supported, frequently updated, and can run on almost any operating system. GDAL runs on the command line, and installation is only marginally more difficult than a typical commercial application.
Why Geocode?
Once extracted from their zip file, GRD products downloaded from Vertex can be viewed directly in most GIS environments without any additional steps. The georeferenced TIFF files include the information necessary to allow most GIS software platforms to project the data layers on the fly to match the other layers in your GIS, so you can easily visualize the data without additional effort.
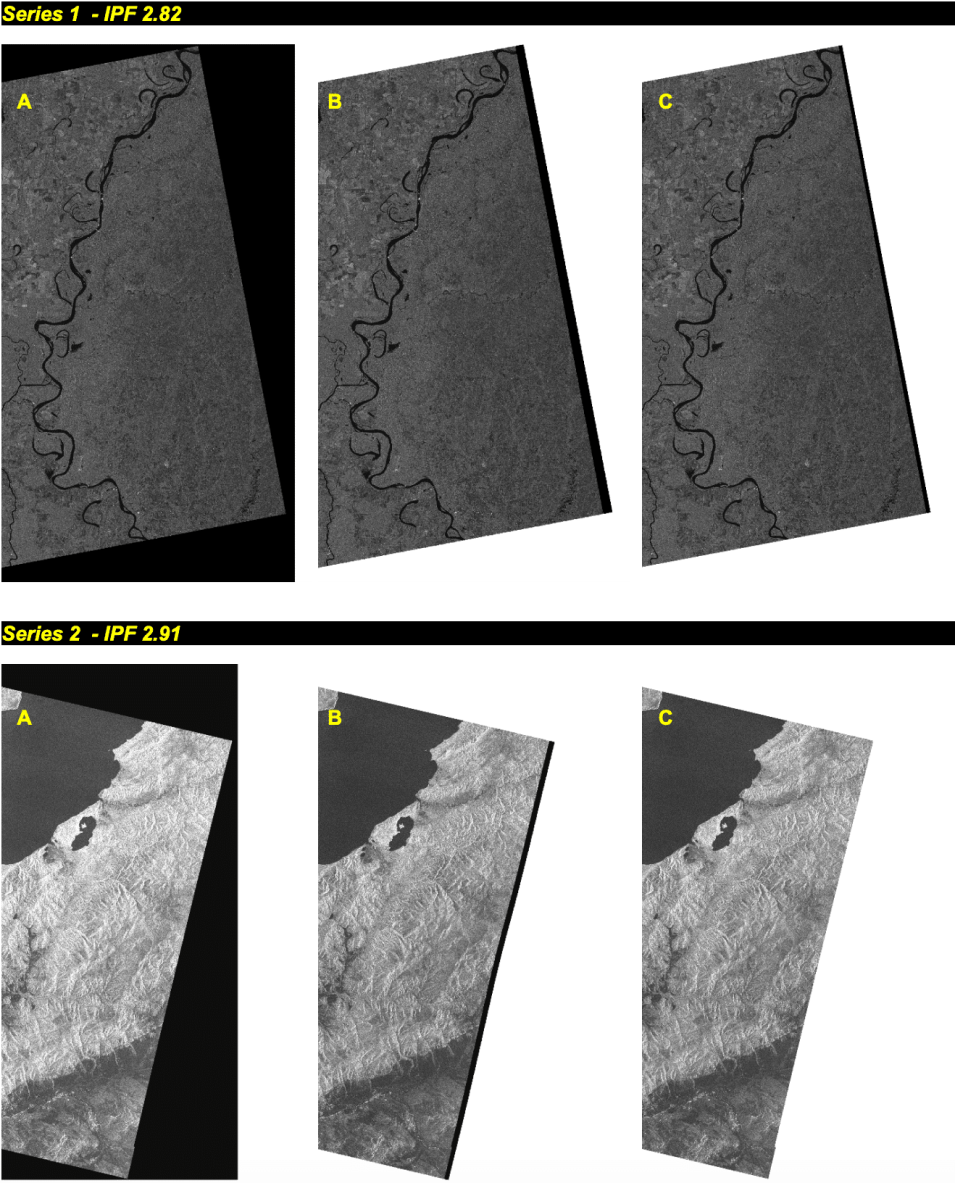
If you are visualizing the images outside of a GIS platform, however, the images may appear reversed or rotated. To display the images as you would expect to see them, the image must be transformed from its SAR geometry into a map projection. When working with SAR data, this process is called “Geocoding.”
Geocoding the imagery will ensure not only that the image displays at the correct location on the Earth’s surface in any given application, but that the image will also display as expected when it is viewed outside of a spatially-enabled framework (i.e. north is up, features are not stretched or reversed in unexpected ways).
Even when working within a GIS, if you want to go beyond simply visualizing the data and perform analysis or geoprocessing functions using the GRD granule, it should be geocoded to a map projection first. You may use GDAL to perform this task and then work with the geocoded products within your GIS environment, but many GIS platforms have built-in tools to accomplish this same task. If you would prefer to work directly within ArcGIS, you can use the Project Raster tool. QGIS users can use the Warp (Reproject) Projections tool in the Raster menu to run a gdalwarp command from the QGIS GUI. For more guidance on using these tools, refer to ASF’s Data Recipes for geocoding products within each of these GIS platforms.
Note that using different geocoding techniques/options may result in slight differences in the output products. While one output is not necessarily “better” than another, it is a good idea to be consistent when generating geocoded products for use in the same project, especially if you are looking at imagery from one location through time.
Why Use GDAL?
For users processing large amounts of data, or those who prefer to work outside of a GIS environment, GDAL is a logical choice. In addition, the ability to call GDAL commands from other scripting languages, such as Python, allows for easy iteration through geoprocessing tasks, or integration of geoprocessing steps into complex scripted workflows. In many cases, geoprocessing with GDAL is much faster than running a comparable tool in ArcGIS, but ultimately the best approach for any given workflow will depend on the specific goals and preferences of the user.
Geocoding is NOT Terrain Correction
It is important to understand that this geocoding process does not involve terrain correction. To match the imagery to actual features on the earth and correct for distortions caused by the side-looking geometry of SAR data, you must perform Radiometric Terrain Correction (RTC) instead. This will be particularly important in areas of high topographic variation. Refer to ASF’s Data Recipes on Radiometric Terrain Correction, or contact ASF to learn about other resources for RTC processing.
Prerequisites
Materials List:
- Windows 10, Mac OS X, or Linux
- GDAL — Geospatial Data Abstraction Library (version 2.2)
- Detailed download and installation instructions are in the How to Install GDAL section.
- Python 2.7 or higher
- Linux and Mac machines already have Python installed
- Windows users will need to download and install Python
- See the How to Install GDAL section for detailed download and installation instructions
- Users with ArcGIS Desktop software installed will already have Python 2.7 installed
- Earthdata login credentials
- If you do not already have an Earthdata account, visit the Earthdata website to register for this free service
- Download Sentinel-1 GRD data using Vertex
- You may use this Sample Granule
- When downloading from Vertex, you must either already be logged in to Earthdata, or you will be prompted to enter your Earthdata Login username and password before the download will begin.
How to Install GDAL
The GDAL project does not produce regular downloadable binaries (executables) for each release — the available version of GDAL will vary between operating systems.
If you already have GDAL installed, skip to the Geocoding Steps section.
Mac OS X installation | Linux installation | Windows 10 installation
Installing on Mac OS X
The easiest approach to downloading GDAL for Mac is to download GDAL 2.2 Complete from the KyngChaos website.
- Download the disk image
- Open the downloaded file (GDAL_Complete-2.2.dmg)
- Double-click on the Install GDAL Complete.pkg file
- You will be warned that the file is from an unknown developer. Open System Preferences, click on Security & Privacy, then click Open Anyway.
- When you are installing GDAL 2.2 with Python 2.7, a message will be displayed stating that Python 3.6 is required. For this tutorial, you can ignore the message.
- Follow the prompts to install
- Copy and paste the following line into a Terminal window:
echo ‘PATH=/Library/Frameworks/GDAL.framework/Programs:$PATH’ >>~/.bash_profile
This will allow you to run the GDAL commands without specifying a path. - Copy and paste the following into the Terminal window:
source ~/.bash_profile - Test your installation by typing or pasting the following command in the Terminal:
gdalinfo --versionA correct installation will output the version number followed by a release date (i.e. GDAL 2.2.3, released 2017/11/20)
Now that you have GDAL installed, you can skip forward to the Geocoding Steps section.
Installing on Linux
The method of installation will depend on your flavor of Linux. On Ubuntu, simply install the GDAL package via the Command Terminal.
To get the latest GDAL version, add the PPA to your sources, and then install the gdal-bin package. At the Terminal prompt type or paste these commands:
sudo add-apt-repository ppa:ubuntugis/ppa sudo
apt-get update
sudo apt-get install gdal-bin
To test your installation:
- Type or paste the following command in the Terminal:
gdalinfo --versionA correct installation will output the version number followed by a release date (i.e. GDAL 2.1.3, released 2017/20/01)
Now that you have GDAL installed, you may skip forward to the Geocoding Steps section.
Installing on Windows 10
Option 1: OSGeo4W Shell
The standard (standalone) installation of QGIS includes an installation of the OSGeo4W Shell. This shell has the basic appearance of the Windows Command Prompt but already has established paths to the installations of Python and GDAL that come with the QGIS installation. If you already have QGIS installed, or wouldn’t mind having QGIS installed, this is a very easy way to access GDAL.
To locate the shell, type OSGeo into the Windows Search bar. If OSGeo4W has been installed, it will appear in the list as OSGeo4W Shell (Desktop App).
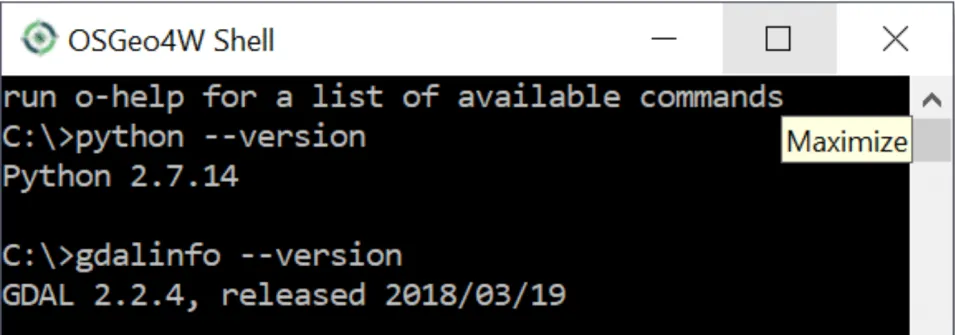
To check the QGIS versions of python and gdal, open the shell and use the commands shown in the image below.
